A
failing laptop charger can turn a productive day into a frustrating race against a dying
battery. Many people immediately assume their laptop has a serious internal
problem when it stops charging, often leading to unnecessary stress or
expensive repair bills. The truth is, the power adapter itself is often the
weakest link and the most common source of charging issues. Learning how to
properly diagnose your charger can save you both time and money, offering a
clear path to resolving the problem without panic.
Visual Inspection: Checking for Physical Damage
Examining the Cable, Connector, and Adapter
Your
first and easiest step is a thorough visual and physical inspection of the
entire charger unit. Begin by carefully examining the entire length of the
cable, paying close attention to areas near the ends that are frequently bent
or twisted during everyday use. Look for obvious signs of damage such as deep
cuts, exposed wires, or sections where the cable has been crushed. The
connector that plugs into your laptop is another critical point; check for any
bent or broken pins inside the tip and ensure it is not loose or wobbly. Don’t
forget to inspect the main power adapter brick for any cracks, dents, or other
physical damage that might have occurred from being dropped or knocked off a
desk.
Signs of Overheating or Electrical Damage
Often,
the damage to a charger isn't just physical but also related to heat or
electrical surges. Look for subtle clues like discoloration on the power
adapter brick, the cable, or even the laptop's charging port; a yellow or
brownish tint often indicates the components have overheated significantly.
Smell the adapter brick and connector for any faint odor of burnt plastic or
electronics, a sure sign that internal components have been damaged by
excessive heat. Feel the surface of the power adapter when it is plugged in;
while it is normal to be slightly warm, it should never be too hot to touch
comfortably.
Using a Multimeter to Test Voltage and Polarity
For
a more precise diagnosis, a multimeter is an invaluable tool that measures
voltage output. First, ensure your multimeter is set to measure DC voltage (V–
or VDC). Refer to the small print on your power adapter brick to find its rated
output voltage (e.g., 19.5V) and current; this is the value you will be testing
for. With the charger plugged into a wall outlet, carefully touch the
multimeter's red probe to the inner conductor of the DC connector and the black
probe to the outer metal sleeve. A healthy charger will show a voltage reading
very close to its rated output; a significantly lower reading or no reading at
all confirms the adapter has failed.
Alternative Methods Without Special Tools
Testing with a Known Working Laptop or Device
If
you don’t own a multimeter, you can still perform a reliable test by using
another device. The most straightforward method is to try your suspect charger
on a known working laptop of the same brand that uses an identical connector
and has similar voltage requirements. Conversely, you can find a known good
charger that is compatible with your laptop and see if it resolves the charging
problem, which would confirm your original charger is faulty. Some modern
chargers with USB-C ports can be even easier to test, as you can try to charge
another USB-C device like a phone or tablet to see if it provides any power at
all.
Observing LED Indicators and Charging Behavior
Your
laptop and charger often provide built-in diagnostics through LED lights and
on-screen behavior that you can observe closely. Most laptops have a charging
indicator LED, usually near the DC port or on the front edge, that lights up
when a valid power source is detected; if this light does not turn on with your
charger, it is a strong sign of an issue. On-screen icons in your computer's
operating system also offer clues; a battery icon that flickers between
charging and not charging points directly to a power delivery problem.

Troubleshooting Common Charger Problems
Dealing with Intermittent Charging or No Power
Intermittent
charging is a common and often fixable issue that usually stems from connection
problems rather than a complete charger failure. The first thing to check is
the wall outlet itself; test it by plugging in another working device to ensure
the outlet is providing power. Carefully inspect the DC connector as it sits in
your laptop's port; if it feels loose or easily falls out, the port on your
laptop may be damaged. Check for debris or lint packed into the laptop's
charging port, which can prevent the connector from making a solid contact.
When to Replace vs. Repair the Charger?
Deciding
whether to repair or replace a faulty charger depends on the damage type and
cost. Simple repairs, like replacing a damaged AC power cord, can be
cost-effective if you're comfortable with basic wiring. However, repairing the
main adapter brick is not recommended due to high-voltage components. If the
internal electronics are faulty or if the unit has overheated, replacement is
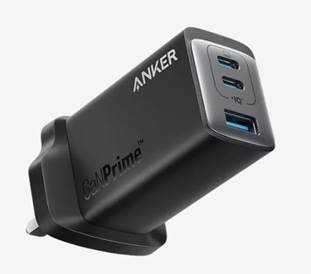
the safest option. For a reliable replacement, consider an Anker laptop
charger, known for its robust build, advanced safety features like surge
protection, and broad compatibility with various laptop models. Investing in a
high-quality charger ensures safe and efficient power delivery, protecting your
laptop from potential damage.
Conclusion
A
functional laptop charger is essential for your portable computer, and knowing
how to test it is crucial. Start with a visual inspection and follow logical
troubleshooting steps to diagnose common power issues. Whether using a
multimeter or substitution, you can determine if your charger needs a simple
fix or replacement. Always prioritize safety; if you notice overheating or
electrical damage, replacing the charger is the safest option. Taking these
proactive steps ensures your laptop stays powered and ready for your daily
needs.