Home surveillance systems
provide homeowners with peace of mind and control over their property's safety.
The right tools and strategies can reduce the need for professionals. This DIY
tutorial covers every critical step in installing your own security system.
Everyone, from techies to beginners, will learn how to avoid mistakes and make
educated decisions. Every aspect matters, from camera selection to mounting.
Make your home safer by following practical advice that makes setup simple and
assures reliable, consistent performance.
What to Know Before Installing a Home Surveillance
System
Choose the Right Type of Camera for Your Home
Homeowners must choose cameras that are appropriate
for their needs. Indoor cameras should be small and inconspicuous, whilst
outside cameras should be waterproof. Infrared or night vision cameras provide
clear nighttime footage. Consider motion detection, two-way audio, and smart
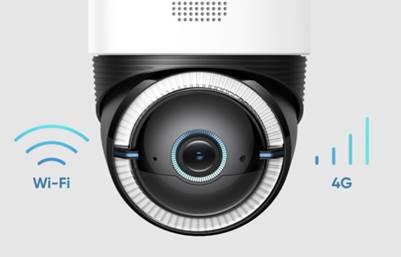
home networking. Wireless cameras are easier to install but are susceptible to
Wi-Fi instability. Wired models are more difficult to set up, but they give
consistent power and connection. Before making a purchase, consider your budget,
technology choices, and home layout. The right home security cameras provide
superior protection and eliminate installation regrets.
Check Local Laws and Privacy Guidelines
Before installing a surveillance system, make sure to
check the local legislation. In many places, recording audio without
authorization is not allowed. Some states prohibit video shooting in public
places. To minimize privacy violations, avoid pointing cameras at your
neighbors' homes. Indoor cameras should be made available to family and guests.
Failure to observe the law may result in fines or system removal. Knowing these
guidelines helps you stay legal and protects your home. Read the manuals and product
agreements carefully, and if required, speak with a residential surveillance
lawyer.
Map Out the Ideal Camera Locations
The effectiveness of home monitoring is determined by
the placement of the cameras. Determine susceptible entry points such as doors,
garages, and first-floor windows. Next, stroll around your property and look
for dark or concealed locations. When setting cameras for wide-angle shots,
avoid direct sunlight and reflective objects. Avoid placing them behind glass
since this may damage motion detection and night vision. Keep cameras out of
reach but accessible for maintenance. Label each region of a printed home
layout. This design stage prevents coverage gaps and ensures that home security
cameras operate smoothly.
How to Install Home Security Cameras the Right Way
Gather the Necessary Tools and Equipment First
Before proceeding with the installation, gather all
necessary tools. The majority of DIY systems require a drill, screwdriver,
ladder, cable clips, and anchors. Prepare the cameras, power adapters, and
mounts. Install wired systems using Ethernet or coaxial cables. Remember your
Wi-Fi router password for wireless setups. Check the manufacturer's directions
for unusual gear. Keep tools organized by installation location. Before using
the camera, test the electrical connections and fully charge the batteries.
Preparing your tools ahead of time saves you time and visits to the hardware
store. With all of the supplies, you'll be able to install your home security
cameras easily.
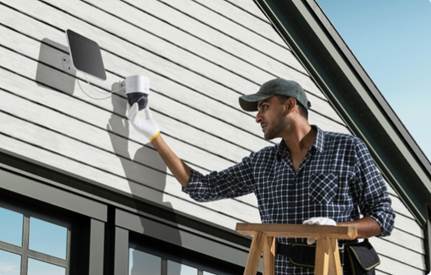
Install Cameras at Proper Angles and Heights
Camera positioning has a significant impact on
performance. Mount cameras 8-10 feet above ground to maintain visibility and
prevent manipulation. For clear faces and activity, aim slightly downwards.
Avoid excessive angles and head-only positions. The camera app allows you to
view footage while adjusting. To avoid glare, point away from lights and
reflective surfaces. Position doorbell cameras at standing height to capture
guests' faces. Proper mounting helps your home security cameras capture clear, actionable footage,
making them a reliable tool for safety and evidence.
Test Power and Wi-Fi Connections Before Final Mounting
Never permanently secure cameras before testing them.
Plug each one near its intended location to ensure that it turns on and
connects to your app or hub. Use the camera app to check the wireless model's
signal strength. Consider using a Wi-Fi extender for weak signals. Make sure
the video and audio work. Inspect wired camera cables for security and
interference. To avoid having to remount, address faults as soon as possible.
Testing ensures that your home security cameras work effectively and don't leave
holes in protection when it counts the most.
What Are the Most Common DIY Installation Mistakes?
Mounting Cameras Too High or Low
Many homeowners place cameras too high, reducing
visual detail, or too low, making them targets. A height of 8-10 feet optimizes
visibility while reducing tampering. Incorrect camera positioning can capture
undesired imagery, such as heads or distant objects. Always check the camera's
field of view before placing it. Real-time app previews allow you to see what
each unit is recording. This setup adjustment prevents major problems later.
Well-mounted home security cameras provide better face recognition and greater
evidence of a security violation.
Ignoring Blind Spots Around the Property
Even properly installed systems can fail due to blind
spots. Walk around the entire property and check the video feeds for any
neglected spots. Criminals could target side yards, basement windows, or rear
doors. Use various cameras to capture different perspectives. Overlay important
views. Move any trees, fences, or gardens that are blocking sightlines. Check
perspectives at various times of day to capture lighting changes. Avoiding blind
spots means that your home security cameras cover every angle, increasing
safety and efficiency.
Forgetting to Secure the Video Feed or App Access
After installation, security doesn't end.
Do-it-yourselfers frequently overlook digital security, leaving their machines
vulnerable. Always update your default passwords and logins. Two-factor
authentication is available for camera apps and hubs. Verify whether your
system transmits encrypted data. Turn off remote access when it's not required.
Fix bugs and vulnerabilities by routinely updating firmware. Use the app only
on devices you can trust. In the event that you disregard digital security,
hackers can gain access to your feed. To keep you safe, access to your home
security cameras is limited. Take software just as seriously as hardware for
total peace of mind.
Conclusion
Home surveillance systems are simple and inexpensive
to set up. Installing dependable home security cameras to protect your family
involves planning and attention to detail. Position and test each camera, obey
the rules, and use the proper equipment. Systems perform better without common
flaws, such as poor placement or insecure feeds. DIY installations save money
and provide complete home monitoring control. Use these instructions to
confidently install cameras in your home and make it safer immediately.
Consider using the smart eufy Floodlight Camera E30 for outdoor lights and
coverage.